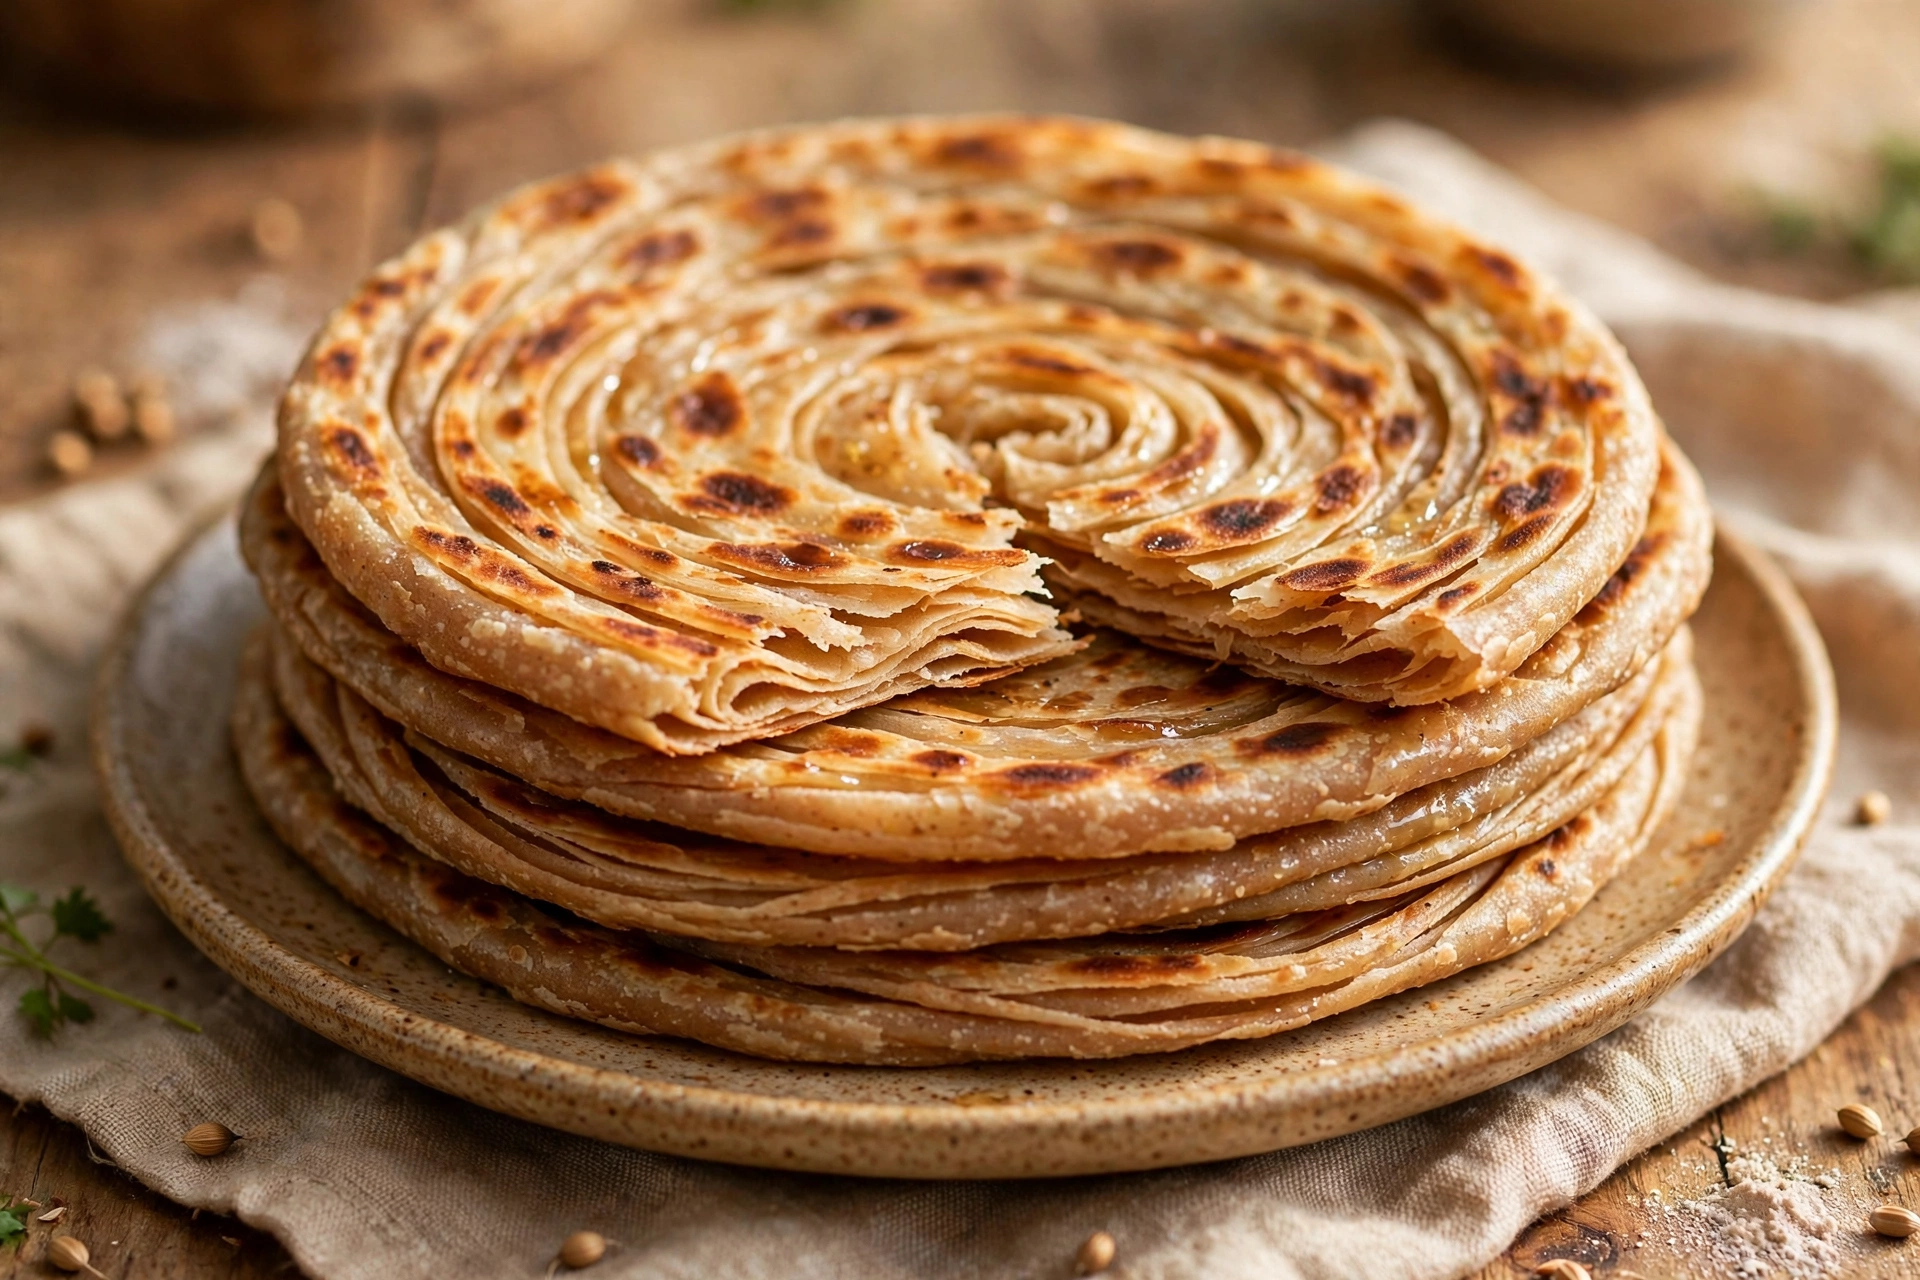
The first time I tried to make lachha paratha, I ended up with something closer to a thick roti — no layers, no flakiness, just disappointment. It took watching my aunt make them three times before I understood: the layers come from the folding technique, not from the ingredients. This lachha paratha recipe will teach you that technique step by step, and once it clicks, you’ll wonder why it ever seemed hard.
Lachha paratha is the show-off of the flatbread world. When you tear one open, it should separate into dozens of flaky, buttery layers — each one crisp at the edges and soft in the middle. It’s the perfect partner for rich curries because those layers are brilliant at scooping up gravy. My family fights over the crispiest ones, and honestly, I can’t blame them.
The dough itself is simple — just whole wheat flour, water, salt, and a little oil. There’s no yeast, no waiting for hours. The magic is all in how you roll, pleat, and coil the dough. I’ll walk you through the fan-fold method, which is the easiest reliable way to get those distinct layers at home.
Why You’ll Love This Lachha Paratha Recipe
- Flaky, visible layers — the pleating technique creates dozens of buttery, pull-apart layers
- No yeast, no waiting — simple dough that rests just 30 minutes
- Crispy outside, soft inside — the perfect texture contrast in every bite
- Better than restaurant — fresh off your own tawa beats anything that sat in a warming tray
- Freezer-friendly — stack cooked parathas with parchment paper and freeze for quick meals
Ingredients
- 3 cups (375g) whole wheat flour (atta), plus extra for dusting
- 1 teaspoon salt
- 1 tablespoon (15ml) vegetable oil, plus more for cooking
- 1 1/4 cups (300ml) warm water, approximately
- 4-5 tablespoons (60-75g) ghee or butter, melted, for layering
- Ghee or oil, for cooking the parathas
Instructions
- Make the dough. Mix the flour and salt in a large bowl. Add the tablespoon of oil and rub it into the flour with your fingertips until it resembles coarse crumbs. Add warm water a little at a time, mixing as you go, until a soft, pliable dough forms. You might not need all the water — atta varies. Knead for 8-10 minutes until smooth and elastic. The dough should be softer than roti dough, almost like play-dough. Cover with a damp cloth and rest for 30 minutes. Don’t skip the rest — it relaxes the gluten and makes rolling much easier.
- Divide the dough. After resting, knead the dough once more for a minute, then divide it into 8 equal portions. Roll each into a smooth ball and keep them covered with the damp cloth so they don’t dry out.
- Roll it thin. Take one ball and flatten it into a disc. On a floured surface, roll it out into a very thin circle, about 10-12 inches across. It should be almost translucent in spots — thinner than you think. This thinness is important because more surface area means more layers.
- Brush with ghee. Brush the entire surface generously with melted ghee. Don’t be shy here — the ghee is what separates the layers and makes them flaky. Sprinkle a tiny pinch of flour over the ghee; this helps the layers stay distinct during cooking.
- Pleat like a fan. Starting from one edge, fold the circle back and forth in narrow pleats, like making a paper fan or accordion. You should end up with a long pleated strip about 1-2 inches wide. This is the key step — each pleat becomes a layer in the finished paratha.
- Coil it up. Take one end of the pleated strip and roll it into a tight spiral, like a snail shell. Tuck the loose end underneath. You’ll have a round, layered disc. Press it down gently with your palm.
- Roll it out again. Dust lightly with flour and roll the coil into a circle about 7-8 inches across. Roll gently and evenly — press too hard and you’ll crush the layers you just created. You should be able to see faint spiral lines on the surface.
- Cook on the tawa. Heat a tawa or heavy skillet over medium-high heat. Place the paratha on the hot surface and cook for 30-40 seconds until small bubbles appear. Flip it over. Drizzle about a teaspoon of ghee or oil around the edges and on top. Cook for 1-2 minutes, pressing gently with a spatula, until golden-brown spots appear. Flip again, add a little more ghee, and cook the other side until equally golden and crisp. Each paratha takes about 3-4 minutes total.
- Crush to reveal layers. This is the fun part. As soon as the paratha comes off the heat, place it between your palms (or scrunch it lightly in a clean cloth) and give it a gentle crush from the sides. The layers will separate and fluff up beautifully. Serve immediately — lachha paratha waits for no one.
Pro Tips
- Roll the first circle as thin as possible. A thin initial roll means more pleats, and more pleats mean more layers. If your first circle is thick, you’ll get 5 layers instead of 15.
- Keep the dough soft. If the dough feels stiff, wet your hands and knead in a sprinkle of water. Stiff dough tears during pleating and won’t layer properly.
- Don’t press hard on the final roll. Gentle, even pressure preserves the pleats. If you roll aggressively, the layers merge back into one thick disc and you’ve lost everything.
- Medium-high heat is the sweet spot. Too low and the paratha dries out before crisping; too high and the outside burns while the inside stays raw. You want steady sizzling.
- Use ghee for the best flavor. Oil works, but ghee gives lachha paratha its characteristic rich taste and helps the layers turn golden and crisp.
- Serve immediately. Lachha paratha is at its peak in the first 5 minutes off the tawa. The layers are crispiest and most distinct when hot.
FAQs
Why don’t my lachha parathas have visible layers?
The usual culprits are rolling the initial circle too thick, not using enough ghee between layers, or pressing too hard during the final roll. Focus on a paper-thin first roll and generous ghee — those two things fix most layer problems.
Can I make the dough ahead of time?
Yes. The dough keeps well in the fridge for up to 2 days in an airtight container or wrapped in plastic. Let it come to room temperature for 20 minutes before rolling, since cold dough is harder to work with.
Can I freeze lachha parathas?
Absolutely. Cook them fully, let them cool, then stack with parchment paper between each one and freeze in a zip-lock bag. Reheat directly on a hot tawa for 1-2 minutes per side — they crisp up beautifully.
What’s the difference between lachha paratha and regular paratha?
A regular paratha is usually folded into triangles or squares, giving you 3-4 layers. Lachha paratha uses the pleating technique to create many more thin, flaky layers — that’s what “lachha” means. The texture is noticeably flakier and more delicate.
Once you’ve made this lachha paratha recipe twice, the pleating becomes second nature. My aunt was right — it’s all in the technique, and now it’s in your hands too.